Prerequisities
You will need devtools and roxygen packages installed for this tutorial.
install.packages(c("devtools", "roxygen"), dependencies = TRUE, type = "win.binary")What is a package and when do we need one?
To put simply a package is a collection of functions that we can load into our workspace and use. Base R contains many functions already, but loading packages extends R functionality. Some of the most popular packages used include dplyr for data manipulation and ggplot2 for creating charts.
Is a package only way to store and load your functions? No. Depending on the size and complexity of your project you should select one of the following options to store your functions.
- Simplest option is to have functions stored in the body of your scipt, load them into the global environment (you’ll see them in the top right corner in R Studio) and use. This will only be good solution for a very small project.
- You can save all of your functions in a single .R script (e.g.
functions.R) and load them in into analytical script usingsource()function e.g.:
source("functions.R")- You can create a package that will contain all your functions. Benefits of that solution include good dependency management (using other packages, requiring specific versions etc.), simple implementation of unit tests and good documentation solutions that make it easier for other people to use your functions. Package is often the best solution for more complex analyses.
Package structure and setup
Package name
Package name should consist of letters and numbers and be informative. You can’t use underscores in a package name, but . are allowed. Make sure that your name is unique to avoid conflicts with existing packages.
Creating basic structure
Devtools create() function creates package folders in current directory.
devtools::create("pckgname")The structure created this way includes folder called R (for all your functions) and DESCRIPTION and NAMESPACE files.
dir("pckgname")[1] "DESCRIPTION" "NAMESPACE" "R" You can view both DESCRIPTION and NAMESPACE files either in RStudio or in text editor.
DESCRIPTION file can be edited manually (e.g. using notepad) and should contain:
- Title of the package
- Any dependencies, including versions (if needed)
- License
- Authors@R field should include details of authors, contributors, and copyright holders
If you open DESCRIPTION file of your newly created package you should see:

NAMESPACE file should not be edited manually, it will be updated automatically when you document your package.
If you open NAMESPACE file of your newly created package you should see:
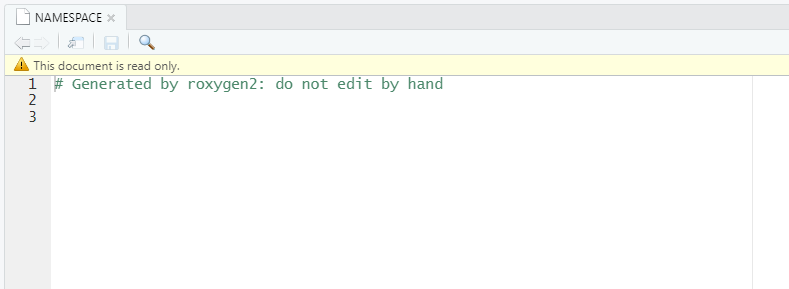 It will remind you that you should not edit it manually.
Below is a basic structure of a package. In analytical pipeline, your package is something that stores all the functions (can store few more things as you will see later), but does not include the main pipeline itself. Your overall project structure will look as follows:
project/
  pckgname/
    DESCRIPTION
    NAMESPACE
    R/
      analytical_functions.R
      data_processing_functions.R
      super_complex_modelling_functions.R

  README.txt
  config.yaml OR config.R
  main.R
This is the basic structure, there will be few more things in the package that you will learn about in the further sections.
Quiz
Question
What would be a good name for your new package?
- dplyr
- quarterly_births
- qrt.birth
See Answer
What would be a good name for your new package?
- dplyr
- quarterly_births
- qrt.birth
Functions and installing/testing your package
Adding functions to your package
Functions need to be stored in /R folder inside the package. You can have individual files for each function or store multiple functions in a single file. Files containing a single function should have the same name as that function. When you store couple of functions together they should be grouped with similar functions (e.g. import functions) and files should have informative names (e.g. data_import.R). The easiest way to add functions to a package is to create an R script and save it in the project/pckgname/R folder.
You can simply open a new R script, name it cool_functions.R and save in your /R folder inside the package folder. You can also create new R script using:
*Note that using setwd() in a chunk only works within that chunk. So your wd outside the chunk stays the same - and other chunks are going to use the global working directory instead.
You can paste in the following function or create your own.
add_3 <- function(x) {
  x + 3
}
Trying out functions from your package
Now that we have something in our package, let’s try installing it. To do so you need to be in your project directory (e.g. “D:/project/”) if you aren’t use setwd("D:/project/") in R console to change your working directory.
To install your package:
devtools::install("pckgname")Once the package is installed, library it in to use its functions (as with any package!).
library(pckgname)
add_3(1)
Error in add_3(1): could not find function "add_3"Annoyingly this does not work!
We will need to add few more steps for it to work, but in the meantime we can use a different function to allow us try out our functions at the development stage.
devtools::load_all("pckgname")
add_3(1)
[1] 4Worked as a charm! Using load_all is the fastest way to try out the functionality of your new functions, so you’re likely to be using it often while building your package.
Ok, but what do you need to do for it to work properly? You’ll have to add proper documentation to your functions.
Package exercises - building a package
These were designed for small group/paired coding, but you should ba able to complete these on your own based on the information from above sections.
Exercises
# 1. Create your own package ----
# Create your own package and inspect the directory created in win explorer or
# in R "files" window on the bottom right.


# 2. Add an .R script to the R folder of the package, that will store your
# functions. You can do it manually or using usethis package.


# 3. Add a simple function to your package.


# 4. Install and library in your package and try calling the function.


# 5. Use appropriate devtools:: function (which one?) to load the package and
# try calling your function.
Solutions
# 1. Create your own package ----
# Create your own package and inspect the directory created in win explorer or
# in R "files" window on the bottom right.
devtools::create("my.awesome.package")

# 2. Add an .R script to the R folder of the package, that will store your
# functions. You can do it manually or using usethis package.
setwd("my.awesome.package")
usethis::use_r("my_functions")

# 3. Add a simple function to your package.
add_3 <- function(x) {
  x + 3
}

# You can simply copy/paste the above into my_functions script OR run:
dump("add_3", file = "my.awesome.package/R/my_functions.R")

# 4. Install and library in your package and try calling the function.
# make sure to remove add_3 from global environment if you can see it there (Environment tab in R Studio)
devtools::install("my.awesome.package")
library(my.awesome.package)

add_3(1)
# this should give you an error!

# 5. Use appropriate devtools:: function (which one?) to load the package and
# try calling your function.
devtools::load_all("my.awesome.package")

add_3(1)
# this should work!
Package documentation
Individual functions in a package need their own documentation. You should also include some documentation for functions even for smaller projects, but for packages they need to follow a specific format. For R packages roxygen allows us to build clean documentation. In Python these “comments” (function documentation) are called docstrings.
The roxygen headers are included in the same script as the function code. You use roxygen comments #' to identify a line as part of the roxygen header.
Minimum functionality and installing your package
As a bare minimum your functions need an @export tag to work. Try adding the following line above your function in the cool_functions.R script:
#' @exportFor the package to work you need to create documentation with devtools::document() and then install your package using devtools::install(). Note that without the export tag devtools::document() the package would not export any functions, so you still wouldn’t be able to use them.
devtools::document("pckgname")i Updating pckgname documentation
i Loading pckgname
Writing 'NAMESPACE'You should see the message “Writing NAMESPACE”.
If you open the NAMESPACE file after documenting you package you should see:

First line has not changed, but now there is a new line telling the package to export add_3() function. All the functions you want users to be able to use need to be exported and appear in the NAMESPACE.
Now, when you install your package you can library it in and use it’s functions.
library(pckgname)
add_3(1)
[1] 4Functions’ documentation
The first three lines of the header have special meaning and you don’t need to use tags to identify them. The first three lines are title, description and details. Since you don’t use any tags to identify the first three lines, it is necessary that you separate them by a new line. For example:
#' Title of the function
#'
#' Description of what function does
#'
#' Details
One of the most important aspects of a function to document are the arguments. With roxygen you specify them with the @param tag. You follow the tag with the argument name and then any details the user needs to know. If there is a lot of information that you need to provide about an argument you might want to consider putting this in the details section instead.
#' @param x Description of the x argumentReturn header will the users what to expect as an output of the function.
#' @return Description of the outputOnly exported functions will be loaded and directly accessible to users when they load a package, so make sure to add the export tags.
#' @exportExample roxygen docstrings
This is minimal documentation that each function should have: * title * description * params * return * export tag (if exported)
#' Add three
#'
#' Computes sum of given number and 3
#'
#' @param x Numeric vector
#'
#' @return Numeric vector with values increased by 3
Another tag that you’ll likely use often is @import tag, which will attach other packages that your functions use and make sure they are installed when your package is installed.
#' @import purrr
#' @import dplyr
Optional roxygen tags (advanced content)
You can also include examples in roxygen header
#' @example
#' \dontrun{
#'   mean(5)
#'}
When you write documentation you may want to format the text to look like code, link to other functions or, particularly for return objects, format as a bulleted list. You can do this using special formatting:
For code you use:
\code{text to format}
To link to other functions you use:
\link[packageName]{functionName}
Note the package name is only required if the function is not in your package.
To include an unordered list you use:
\itemize{}
Inside the brackets you mark new items using:
\item
followed by the item text.
For instance:
#' @return This function returns a \code{data.frame} including columns:
#' \itemize{
#'  \item colname
#'  \item colname2
#' }
You can also add author:
#' @author My Name <myemail@example.com>or link to other functions:
#' @seealso \code{\link[packagename]{functioname}}In addition to the individual functions you can also document the whole package.
When you document a package you can use all of the same tags as for functions but the problem that you have is that there is no R code to document. Instead you put the keyword _PACKAGE underneath your package header.
The script should be saved in R directory in file with package name, e.g. pckgname.R
#' Title
#'
#' Description
#'
#' @docType package
#' @name pckgname
"_PACKAGE"
Produce documentation
Once you created roxygen headers you can create documentation for your package.
Using roxygen comments will help you build code documentation when you run
devtools::document() function and will update NAMESPACE file, but not the
DESCRIPTION file. You can update the description file manually. For instance, roxygen won’t update the Dependencies or Imports in the DESCRIPTION file.
Documentation exercises
Exercises
# 6. Add roxygen comments to your .R script, above the function definition.
# Then document and update the package loaded into your environment with load_all.

devtools::document("")
devtools::load_all("")
# Now see what happens if you try finding help on your function.

?your_function_name

# 7. Add one of the functions from the previous session to your package and
# create roxygen documentation for it.
Example solutions
# 6. Add roxygen comments to your .R script, above the function definition.
# Then document and update the package loaded into your environment with load_all.

#' Add three
#'
#' @param x numeric vector
#'
#' @return numeric vetor with values increased by 3
#' @export

add_3 <- function(x) {
  x + 3
}

devtools::document("my.awesome.package")
devtools::load_all("my.awesome.package")
# Now see what happens if you try finding help on your function.

?add_3

# 7. Add one of the functions from the previous session to your package and
# create roxygen documentation for it.
Unit testing and Quality Assurance
What are unit tests?
Unit tests check whether functions do what is expected of them. No more no less. Ideally, you would like a 100% of test coverage, which means that every functions has tests that check for every eventuality. More realistically 60-70% test coverage is good.
To create unit tests, you’ll produce dummy data and run your function using this data to check if it produces expected output. Not as difficult as it sounds is it?
Where to put unit tests in a package?
Setting up folder for unit tests
usethis::use_testthat() # your wd should be in the packageYou could also create these folders manually - let’s have a look how it should look like.
dir("pckgname")[1] "DESCRIPTION" "man" "NAMESPACE" "R"
[5] "tests" You can see a folder called tests - let’s see what’s inside.
dir("pckgname/tests")[1] "testthat.R"You should see a folder called testthat - this is where you will need t save scripts with unit tests. The testthat.R script ensures the tests run as expected within package structure (e.g. with various devtools functions), so you should not edit that one.
How to write unit tests with testthat?
For each function you’ll need a separate .R file named test-function_name.R. Inside you create test data and output that function should produce for the test data you create within the test script. Then you compare the expected output (that is hardcoded) with output of the function.
You can create testing scripts manually - just as describe above or for function called “function_name” you can use:
usethis::use_test("function_name") # creates and opens tests/testthat/test-function_name.RIf your functions are grouped in an R script together e.g. pckgname/R/data_processing.R your test files should be named the same as the function files, e.g.:
usethis::use_test("data_processing") # creates and opens tests/testthat/test-data_processing.RYou can use expect_equal(), expect_equivalent() and expect_identical() in order to test whether the output of a function is as expected. These three functions all have slightly different functionality:
testthat::expect_identical()checks that the values, attributes, and type of both objects are the same.testthat::expect_equal()checks that the values, and attributes of both objects are the same. You can adjust how stricttestthat::expect_equal()is by adjusting the tolerance parameter.testthat::expect_equivalent()checks that the values, of both objects are the same.
See example of what test script should contain:
test_data <- c(2, 3)
expected_output <- c(5, 6)
function_output <- add_3(test_data)


testthat::test_that("Checking expected outcome matches outcome for add_3 function", {
  testthat::expect_identical(function_output, expected_output)
})
What should you be testing?
Everything that is crucial for the function to work. It is not possible to test for every possibility, but checking how function will handle various combination of arguments, extra columns or different types of values (e.g. 0, NaNs, empty cells) can be useful. You can also check if function will throw an error or a warning when it shoud:
testthat::expect_error(1 / "a")

testthat::expect_warning(log(-1))
Other tests can involve testing whether output is of specific size or class. Functions that will check for these aspects are:
testthat::expect_length()
testthat::expect_s3_class()
testthat::expect_s4_class()
testthat::expect_type()
How many tests for a function? (optional)
Each function needs to have a single file for unit tests, but there can be multiple unit tests inside. For instance, if your function includes conditional statements, you should tests all of the conditions (e.g. TRUE/FALSE).
set_y_if_x <- function(y, x = TRUE){
  if (x == TRUE) {
    y <- y + 1
  }
  y
}


testthat::test_that("Checking expected outcome when x is TRUE", {
  test_y <- 1
  expected_output <- 2
  function_output <- set_y_if_x(test_y, x = TRUE)
  testthat::expect_identical(function_output, expected_output)
})
Test passed testthat::test_that("Checking expected outcome when x is FALSE", {
test_y <- 1
expected_output <- 1
function_output <- set_y_if_x(test_y, x = FALSE)
testthat::expect_identical(function_output, expected_output)
})Test passed You can also have multiple expect functions inside one test_that statement. This could be useful when checking multiple properties of the output. For instance:
change_col_to_factor <- function(df, col_name) {
  df[, col_name] <- as.factor(df[, col_name])
  df
}

testthat::test_that("Checking data frame column types are as expected", {
  test_df <- data.frame(
    a = 1:3,
    b = c("a", "b", "c"),
    c = c("A", "A", "B")
  )
  function_output <- change_col_to_factor(test_df, col_name = "c")

  testthat::expect_type(function_output[, "a"], "integer")
  testthat::expect_type(function_output[, "b"], "character")
  testthat::expect_s3_class(function_output[, "c"], "factor")
})
Test passed Testing your package
It is good to run unit tests on the package whenever you change functionality. There is a simple way to do it:
devtools::test("pckgname")UnExported functions (optional)
Testing non exported functions:
testthat::expect_equal(pkgname:::function_name(input), expected_output)Only exported functions will be loaded and directly accessible to users when they load a package.
However it is possible to access non exported functions of a package:
pckgname:::nonExpfun(arg1)Quality Assurance
Complex pipelines should contain unit tests that cover most functions. However, you still should have your code peer reviewed and quality assured by another analyst.
Testing excercises
Exercises
# 8. Create unit tests for both functions in your package.


# 9. Run unit tests for the package.
Example solutions
# 8. Create unit tests for both functions in your package.
usethis::use_testthat() # create folder for tests in your package
usethis::use_test("add_3") # this can be also created manually

# copy the below into my.awesome.package/tests/testthat/test-add_3.R
testthat::testthat("Function adds 3 to a vector", {
  output <- add_3(1)
  expected_output <- 4
  testthat::expect_equal(output, expected_output)
})


# 9. Run unit tests for the package.
devtools::test("my.awesome.package")
How to share your package?
Upload the package folder on git, then people can simmply clone it and run devtools::install().
You can also add it on cran, but we won’t cover that here - see more advanced resources below.
Additional resources
For more information see:
- Packaging your code in R - book
- Packages in R and Python - course on LearningHub
- Introduction to Unit Testing - course on LearningHub
Note that LearningHub resources are only available for colleagues from ONS and other government departments.