rapid.spreadsheets
rapid.spreadsheets is an R package that was created to help government analysts create reproducible spreadsheets. It can simplify production of data tables/ reference tables in excel files. Tables produced using the package should meet accessibility guidelines*.
Unlike some other packages available rapid.spreadsheets includes embeding both internal (to other tabs in the workbook) and external links. You can also easily build on it and change formatting using openxlsx package.
Installation
You will need to install openxlsx package and rapid.spreadsheets package.
openxlsx is available on Cran, so you just need to run:
install.packages("openxlsx")To install rapid.spreadsheets you will first need devtools package, that will allow you to install it directly from git:
devtools::install_github("RAPID-ONS/rapid.spreadsheets", dependencies = TRUE, build_vignettes = TRUE)Example reference tables
Below is and example of producing simple reference tables with Cover Sheet, Notes and a few tables.
Setup
Start by loading in the necessary packages.
First you need to create a standard openxlsx workbook and then you can use functions from rapid.spreadsheets package to add tables with appropriate formatting.
- Note that in this tutorial we will be creating new workbooks multiple times as we will want to overwrite tabs with the same names. You will only need to create it once for one xls file.
wb <- createWorkbook()Cover sheet
Let’s start with cover sheet as this is often the first tab in data tables.
We will use a .txt file to populate our example cover sheet, but you can also use a standard data.frame in R. It should only contain a single column. Name of the column is irrelevant as it won’t be used, so we set header to FALSE.
cover_sheet_text <- read.csv(
  "cover_sheet.txt",
  header = FALSE,
  sep = "\t",
  fileEncoding = "UTF-8-BOM")
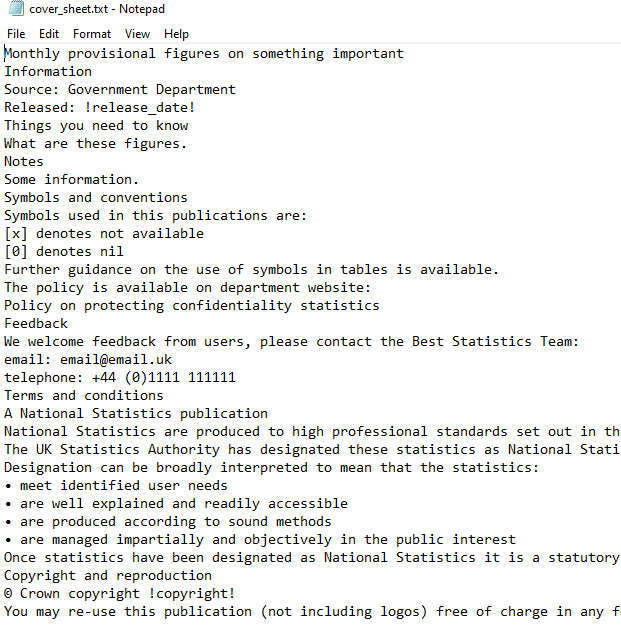
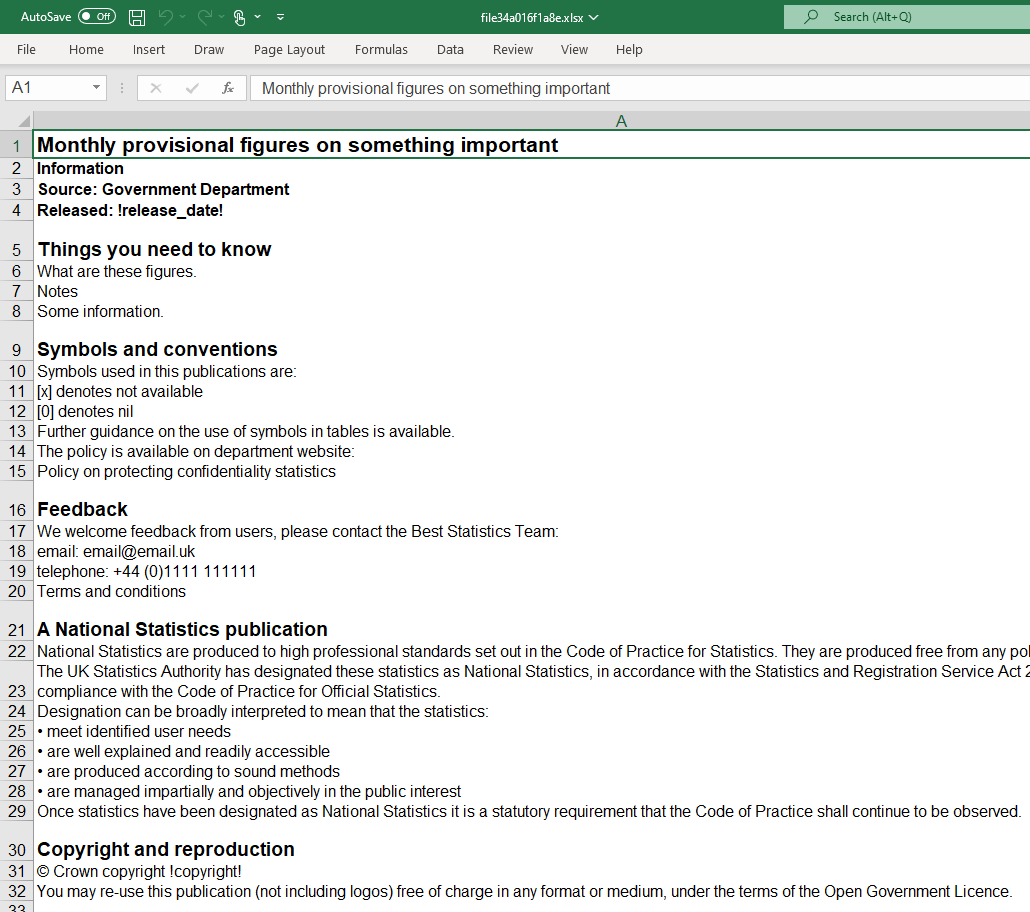
To create simple cover sheet tab you can use create_cover_sheet function. Using optional subheadings and rows_t_bold arguments you can specify which rows should be formatted as subheadings and which ones should be as bold text.
create_cover_sheet(
  wb = wb,
  text_df = cover_sheet_text,
  subheadings = c(5, 9, 16, 21, 30), # rows with subheadings
  rows_to_bold = c(2:4) # rows to apply bold font
)
To have a peak on how our spreadsheet will look like we can use following openxlsx function:
openXL(wb)
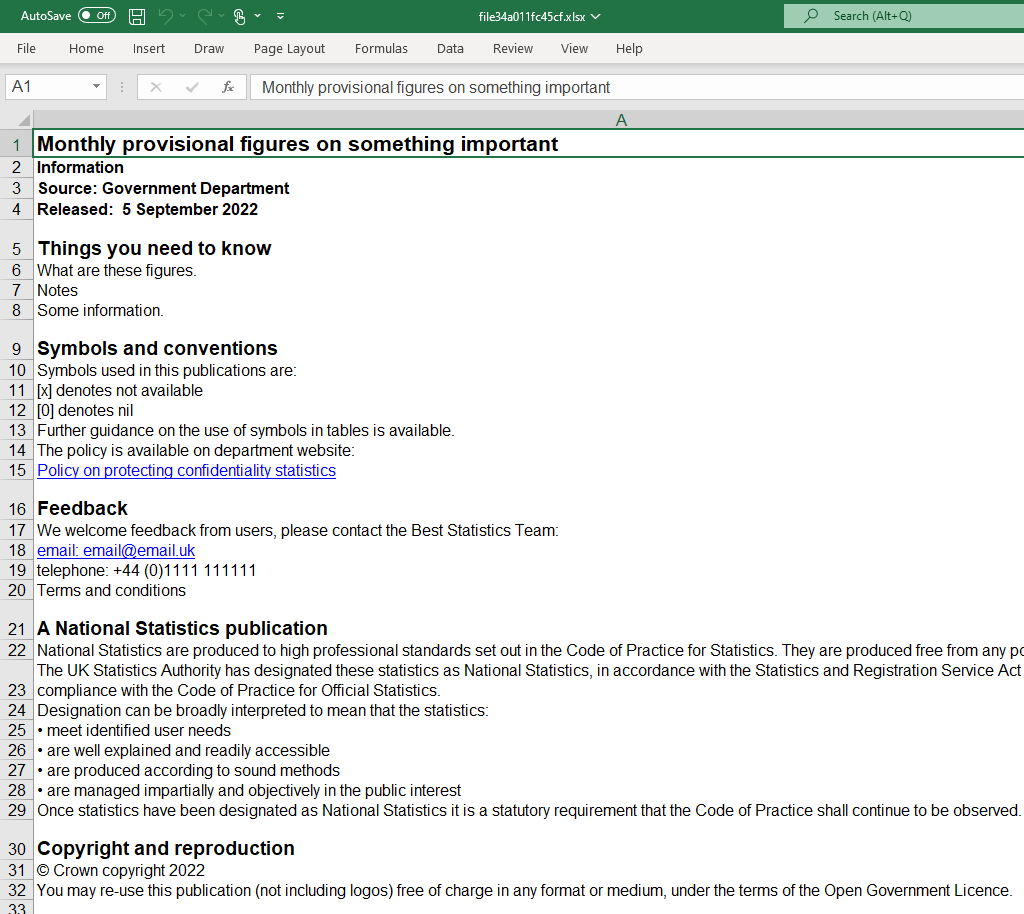
The information contained in cover sheets and notes is often static, but usually you need to update some parts of it - to help automate this you can use a replace argument in the function. In this example we change release date to a given date and insert publication year into row with copyright information.
replacements <- data.frame(
  replace = c("!release_date!", "!copyright!"),
  with = c(" 5 September 2022", "2022"))
You can also easily add links to your cover sheet by creating a data.frame that contains rows and links column. Rows should indicate which row in the cover sheet data frame contains the corresponding link. Website urls need to be stored as characters. When you include email address simply add “mailto:” in front of email address.
cover_sheet_links <- data.frame(
  rows = c(15, 18),
  links = c("https://github.com/RAPID-ONS", "mailto:email@email.uk"))
Now you can create cover sheet with replacements and links using create_cover_sheet function.
wb <- createWorkbook()
create_cover_sheet(
  wb = wb,
  text_df = cover_sheet_text,
  subheadings = c(5, 9, 16, 21, 30),
  rows_to_bold = c(2:4),
  hyperlinks = cover_sheet_links,
  replacements = replacements
)
openXL(wb)
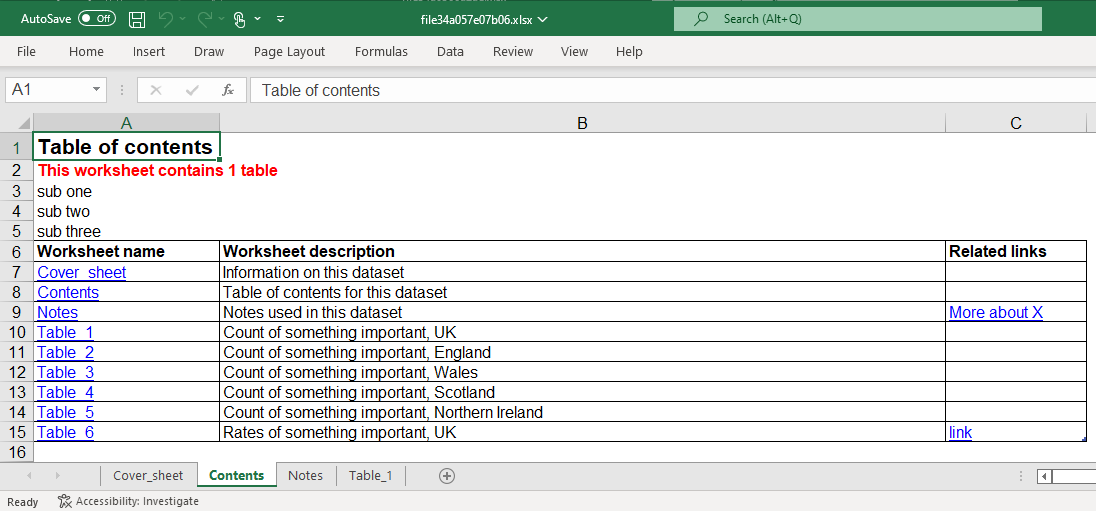
Contents sheet
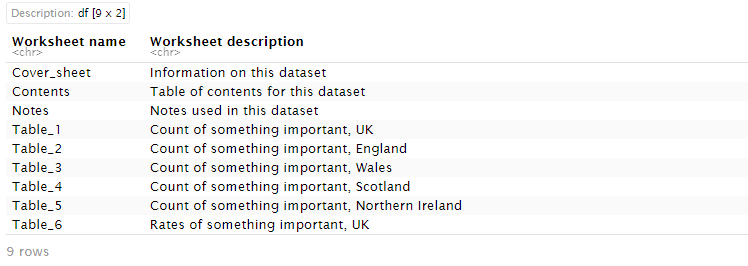
Contents sheet contains a table linking to all the other tabs in the excel documents in one column and describing waht they are in the second column. It can also have a third column with links.
Our example content .txt file has to columns. You can also create a data frame with two columns instead of using a .txt file. This time column names are important as we will use them in the table.
As a minimum your contents data.frame should contain two columns and first column should contain the names of the worksheets in your workbook.
contents_text <- read.csv(
  "contents_table.txt",
  header = TRUE,
  sep = "\t",
  quote = "",
  fileEncoding = "UTF-8-BOM",
  check.names = FALSE)
contents_text
Optionally you can also have a third column with links. Again name of the column will be used directly in the table. It should contain text displayed for the urls in the rows in which you’d like to have links, rest of the rows should be NA. For instance:
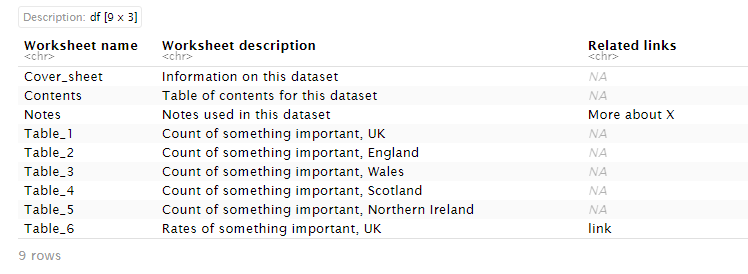
To add hyperlinks you will also need to specify which rows of the table they are and urls of the websites they should direct to. Here we want to add two links in rows 3 and 9. Note that you will need that third column in the contents data frame to add the hyperlinks.
hyperlinks <- data.frame(
rows = c(3, 9),
links = c("https://rapid-ons.github.io/training",
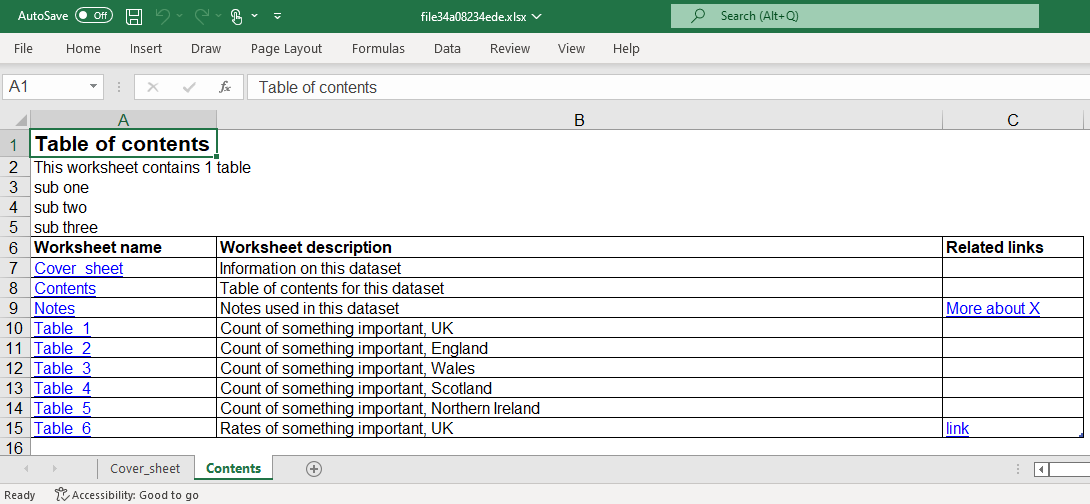
"https://github.com/RAPID-ONS/rapid.spreadsheets"))We can also add additional subtitles to our contents sheet if we like to. To do so, create a character vector where each element will be changed into additional row of text and places under the sheet title.
subtitles_vector <- c("sub one", "sub two", "sub three")To create contents worksheet we use create_content_notes function. Note only wb and df are required arguments, other are optional.
create_contents_notes(
  wb = wb,
  df = contents_text,
  additional_text = subtitles_vector,
  hyperlinks = hyperlinks
)
openXL(wb)
Notes sheet
Most datasets are accompanied by a set of information providing users with details necessary to interpret the data such as information on data sources and/or methods. These are often brought together in a notes table.
Notes table can be produced using create_content_notes function, and similarly to contents data.frame it can have two or three columns.
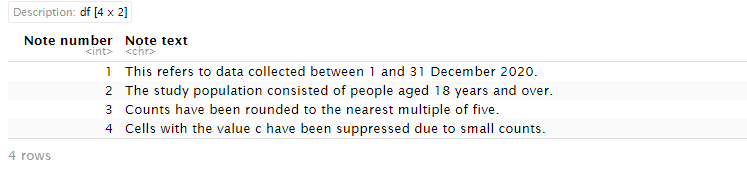
Our example notes table has two columns, but you can add more and hyperlinks in the same way as for contents table.
notes_text <- read.csv(
  "notes_table.txt",
  header = TRUE,
  sep = "\t",
  quote = "",
  fileEncoding = "UTF-8-BOM",
  check.names = FALSE)
notes_text
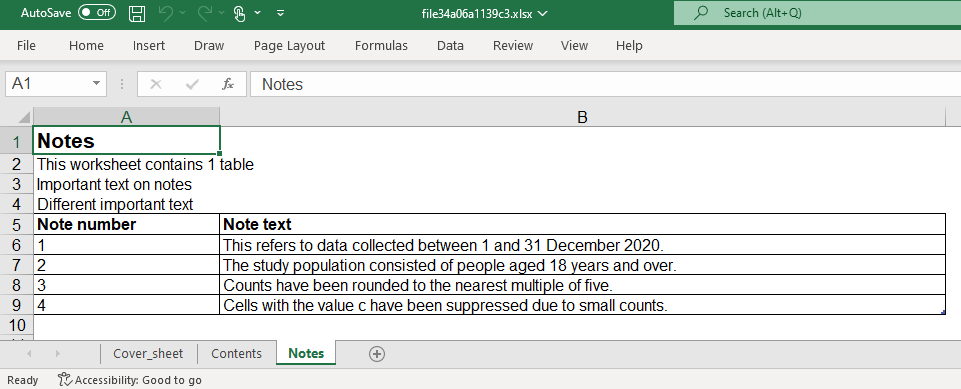
When using create_content_notes for a sheet different than contents we need to change default tab_name to the sheet name we want to use and heading to the title we want to use. We also need to set content_links argument to FALSE - otherwise it will treat the values in the first column as names linking to respective tabs of the excel document.
create_contents_notes(
  wb = wb,
  df = notes_text,
  tab_name = "Notes",
  heading = "Notes",
  contents_links = FALSE,
  additional_text = c("Important text on notes", "Different important text")
)
openXL(wb)
Data table sheets
For sheets containing actual data tables we can use standard data.frames with all the data we want to publish. The function will use the column names in the data.frame directly - if you want to ensure that spaces are preserved you need to set check.names argument to FALSE when creating/adding colummns to your data.frame.
df <- data.frame(
  Sex = c(rep("males", 4), rep("females", 4)),
  "Age group" = rep("10 to 14", 8),
  Deaths = as.character(c(seq(6.25, 7.75, 0.25), 2222.22)),
  Rate = c(1:6, 1000, "[x]"),
  check.names = FALSE # use this to retain spaces in column names
)
df
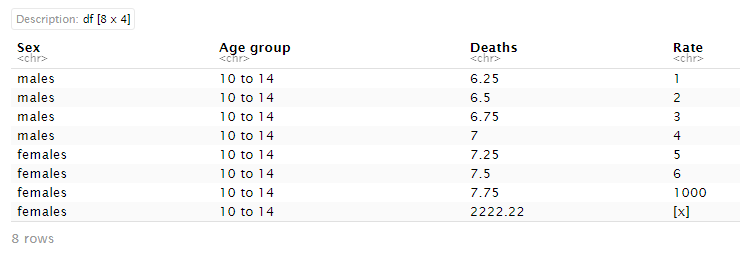
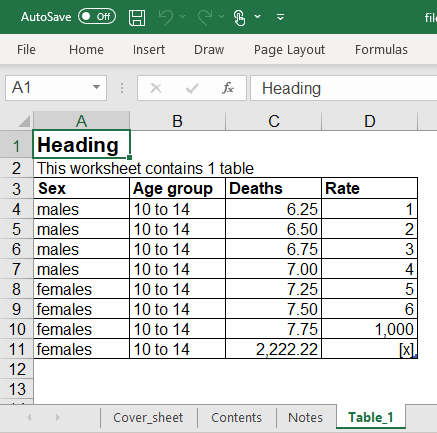
You can set up desired formatting styles for numeric columns. A For instance if you have columns that contain characters as well as numbers (e.g. [x]) you will get “Numbers stored as text” warning in your excel document. To avoid that, specify affected column numbers as a numeric vetor to num_char_cols argument. You can also specify column numbers that should be displayed with no docimal points, one decimal point etc. All styles will show thousands with a comma.
create_data_table_tab(
  wb = wb,
  df = df,
  tab_name = "Table_1",
  num_char_cols = c(3, 4),
  no_decimal = 4,
  two_decimal = 3
)
openXL(wb)
Saving your document
To save the file use saveWorkbook function from openxlsx package.
saveWorkbook(wb, "filename.xlsx")Additional formatting options
Check help pages for each function to see additional options. For instance:
?create_cover_sheetYou can easily add additional styles to specific cells using openxlsx package and setting stack argument as TRUE. For instance:
red_bold <- createStyle(fontColour = "#ff0000", textDecoration = "Bold")
addStyle(wb,
         sheet = "Contents",
         style = red_bold,
         rows = 2,
         cols = 1,
         stack = TRUE
)
openXL(wb)
To learn more about formatting in openxlsx package have a look at the vignettes. After installing the package you can find them by running:
browseVignettes("openxlsx")